Want to save time by scheduling and reposting your social media posts?
Interested in free tools to help?
In this article, you’ll discover how to use IFTTT and Google Calendar to publish and repeat your social media posts for as long as you want.
#1: Create a Google Calendar for Your Content
We all have limited budgets and time. So how do we use our resources wisely?
This article walks you through the process of setting up a recipe in IFTTT, populating a CSV file with your content, and uploading the file to Google Calendar. You can repeat and loop your social media posts, all without spending a dime.
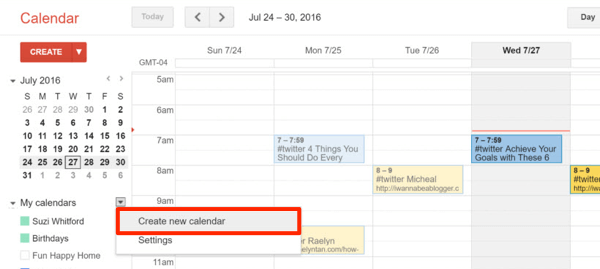
The first thing you need to do is create a Google calendar for your content.
Log into your Gmail account and create a new Google calendar. This is where you’ll load the queue of social media posts to loop. If you don’t already have a Gmail account, you can create one here.
#2: Set Up a Recipe in IFTTT
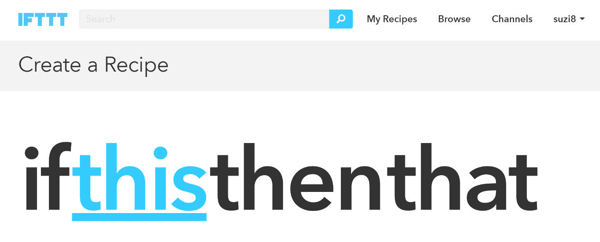
Now go to IFTTT to set up a connection, called a “recipe,” between your social media account and Google calendar.
Click My Recipes at the top of the window and then click Create a Recipe. Next, click “this.”
Type “Google Calendar” in the search field. Then click on the Google Calendar icon when it appears.
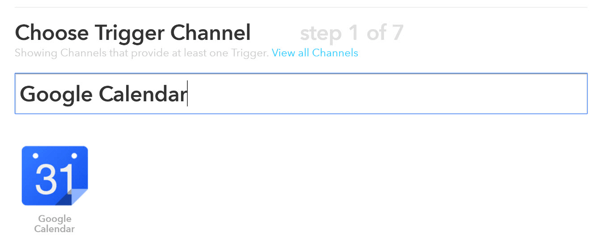
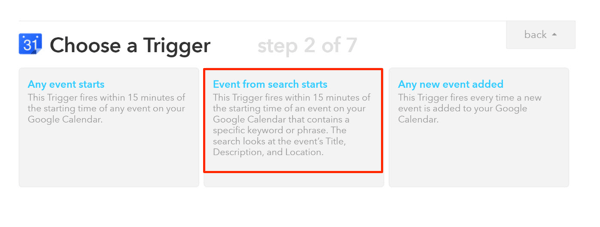
For the recipe’s trigger, select Event From Search Starts. This trigger will fire every time IFTTT sees an event on your calendar.
Next, complete the trigger. In the Keyword or Phrase text box, enter a hashtag to associate with the social media account you’ll connect; this is the trigger keyword for IFTTT. When IFTTT sees this hashtag, it will execute the recipe. For example, type in #twitter and click Create Trigger.


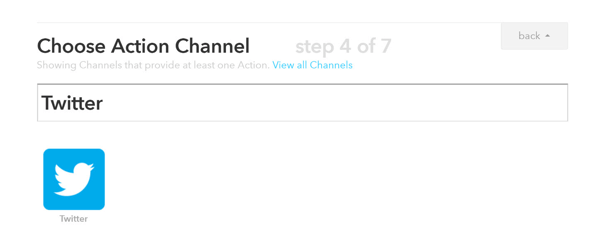
Now that you’ve connected your Google calendar, the next step is to set up the action. Click on “that” to connect your social media account.
In the search box, type in “Twitter” and click the Twitter icon when it appears.
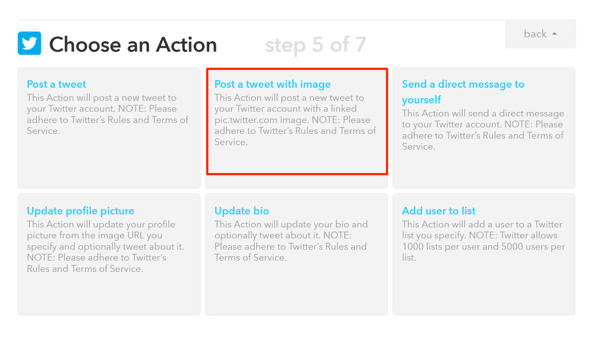
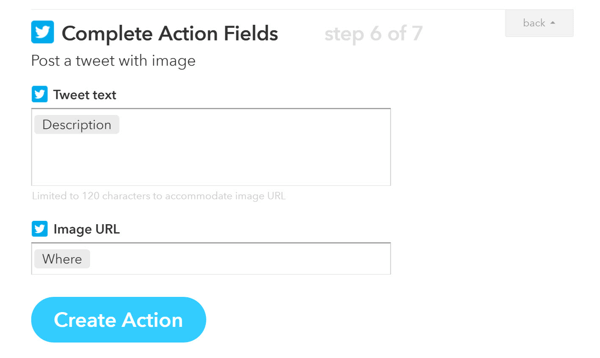
For the action, choose Post a Tweet With Image.
In the Tweet Text field, you want to add Description. To do this, click the beaker icon on the right, select Description from the drop-down list, and click Add Ingredient.
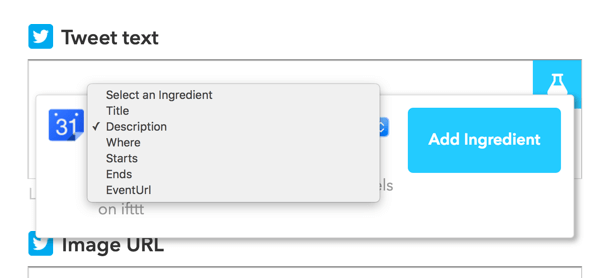
Under Image URL, add the ingredient Where. When you’re finished, click Create Action.
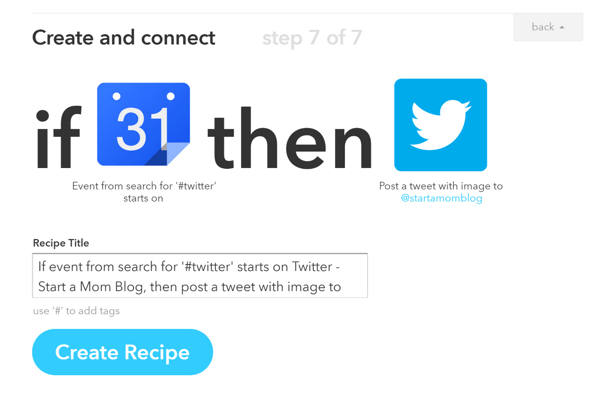
Finally, click Create Recipe. You’ve now connected your Google calendar and Twitter account.
Note that there are many other IFTTT recipes that will let you connect different applications.
Tip: You can set up this same recipe with Facebook and use an applicable hashtag like #facebook. When you include both hashtags (#twitter and #facebook) in the title of your Google calendar event, both recipes will be executed. IFTTT will then automatically post to both of your social media accounts at the same time!
#3: Fill Your Google Calendar With Social Media Posts
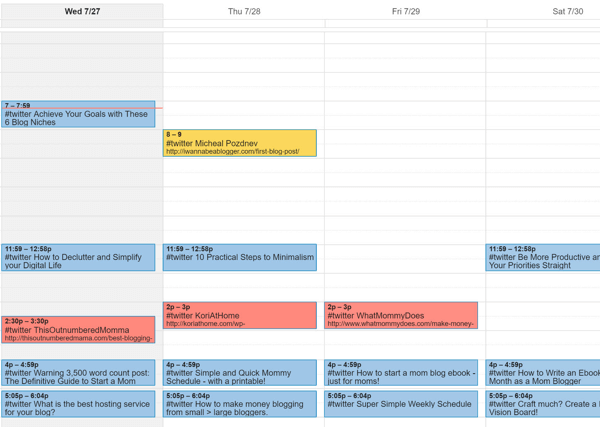
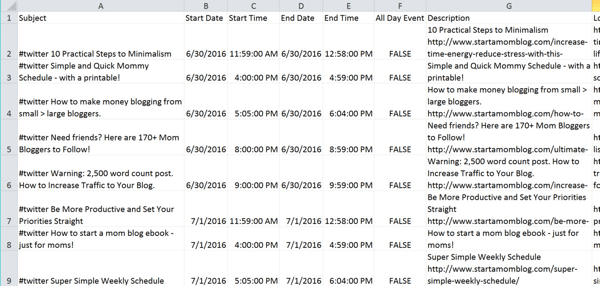
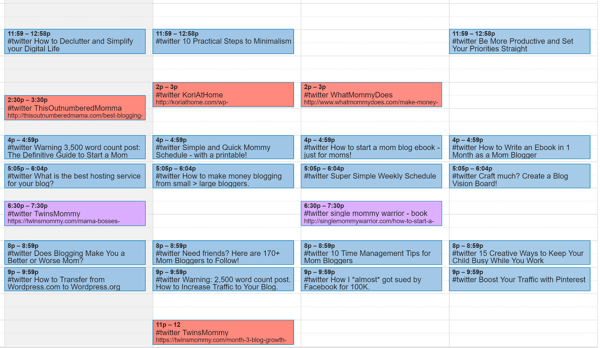
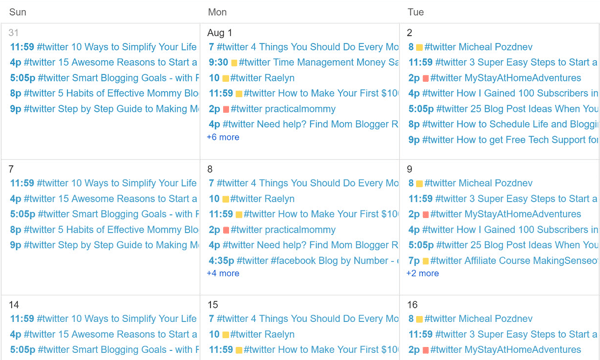
For this step, you want to add your content to a CSV file and upload it to Google Calendar. Here’s what your calendar might look like after your posts are scheduled.
When you’re uploading a large number of posts to Google Calendar, using a CSV template can save you a lot of time. You can create your own or download a template.
Here are the columns to include in your spreadsheet:
Column A is the subject of your post. This information won’t show up in your published post. Remember to include the hashtag you created in your IFTTT recipe to trigger your action.
Tip: Include all of the hashtags you set up to post to multiple social media accounts from one event.
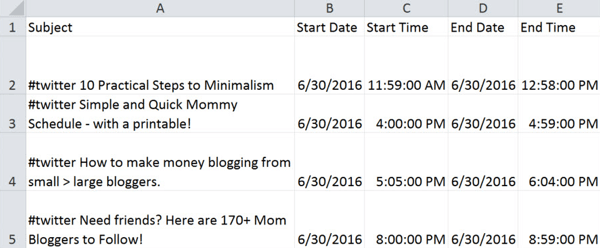
Column B is the start date. This is the day your post will be published. Use a short date format for this column.
Column C is the start time. This is the time your post will be published. Use a time format for this column.
Column D is the end date. This date needs to be the same as the start date and use a short date format. Note that IFTTT doesn’t consider the end date.
Column E is the end time. Make sure the end time is a few minutes after the start time. Use a Time format. Note that IFTTT doesn’t consider the end time.
Column F is for all-day events. Enter FALSE in all of the rows in this column.
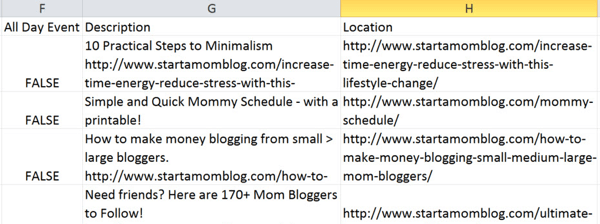
Column G is the description. Type in the text of your post. Keep it short if it’s for Twitter and include your link.
Column H is the location, which is your image URL. You can either use the link to your article to have your featured image show up or paste a specific image URL you want to use in column H for each post.
When you’re finished, your spreadsheet will look something like this:
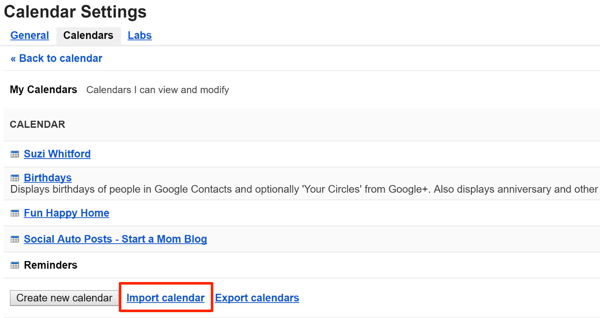
After you’ve populated your CSV file with posts, you need to upload the file to Google Calendar. Navigate to Calendar Settings and click Import Calendar.
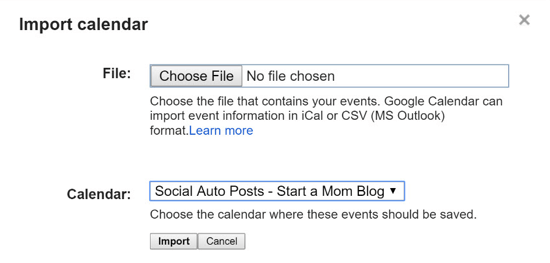
In the pop-up window, choose your CSV file, select the calendar you want to populate, and click Import.
Your calendar should now be populated and look similar to this.
Add Social Media Posts to Your Calendar Manually
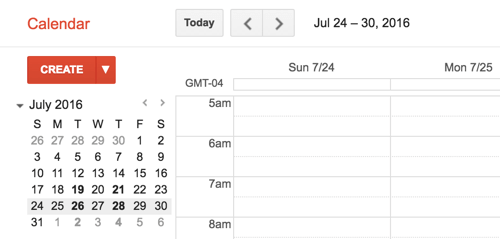
If you have just a few posts to add to your calendar, you can just create events directly in the calendar itself. To add an event, click the red Create button.
On the next page, fill in the details for your event. When you enter the title of the post, be sure to include the trigger hashtag (#twitter, for example).
In the Where text box, add your image URL or paste the link to your post if you want your featured image to be used.
From the Calendar drop-down list, choose your calendar.
For the description, type in the text you want to show in your post. Be sure to include your link.
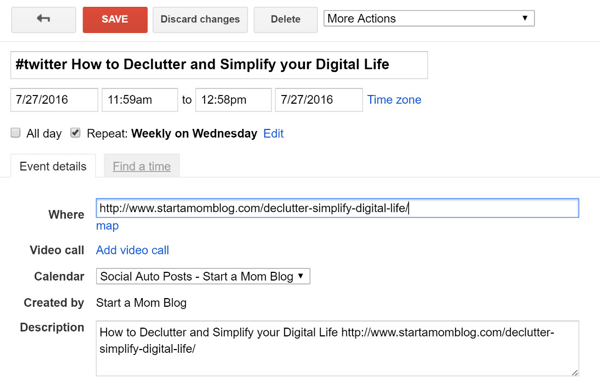
When you’re finished, click Save to add the event to your calendar.
#4: Repeat Each Post as an Event in Google Calendar
Congratulations on getting to this step. This is the most exciting part of the process!
This one-time setup takes a little effort, but it can automate publishing your scheduled social media posts indefinitely. Or you can set an end date if you want.
Now, open the first event and select the Repeat check box.
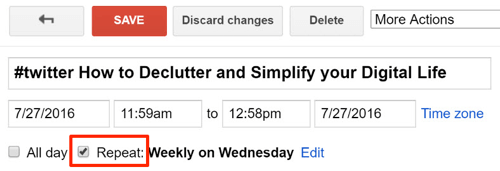
In the pop-up box, select an interval for repeating the event from the Repeats drop-down list. You can also select dates on which you want the event to occur.
Lastly, choose an end date for the post. Or if you want it to repeat forever, select the Never option button.
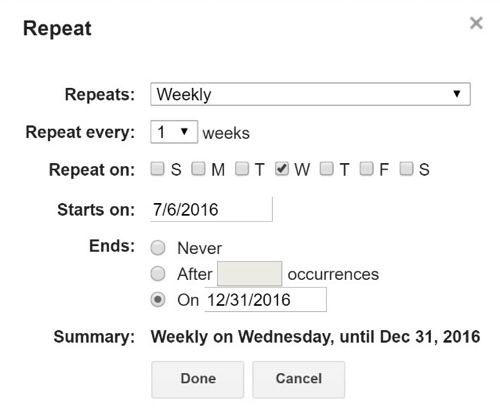
When you’re finished, click Done and then click Save on your event.
Now repeat this process for all of your events.
When you’re finished, here’s what the monthly view of your calendar might look like. All of these posts are looping on a set cadence.
You can add events individually when you create new posts or you can delete posts that aren’t doing well. The flexibility and ease of this system are amazing.
Conclusion
Keeping your social media accounts filled with content can be a full-time job. But delivering content to your audience is a crucial part of your social media marketing.
Now you can automate and loop your posts using free apps such as IFTTT and Google Calendar. The process takes 15 minutes to set up and a few more minutes to populate your CSV file. But when you’re done, you’ll have your posts automatically publishing to your social media accounts and looping too!
This process works well for both Twitter and Facebook.
What do you think? Have you used free apps to schedule and repeat posts? What techniques work best for you? If you have any questions, please share them in the comments.


No comments:
Post a Comment